Battle Jacket Builder: Plan Before You Sew
Place the patches you care most about first, then build around them. Where the backpatch, chest, sleeves and side panels actually work, and which spots crease, rub or disappear.
Battle Jacket Builder: Plan Before You Sew
A backpatch that looked perfect on your floor can swallow a vest once it is surrounded by side patches, studs, and seams. A battle jacket builder gives you a place to make those mistakes before you put a needle through denim. You can test the shape of the whole piece, move patches around without regret, and arrive at a layout that feels like yours before the sewing starts.
That matters whether this is your first vest or your fifth jacket. Patches are not always cheap, and some are hard to replace. Planning does not make a battle vest less DIY. It gives your DIY work a stronger starting point.
What a Battle Jacket Builder Actually Helps You Solve
A physical jacket is a strange canvas. It has pockets, lapels, shoulder seams, buttons, uneven panels, and a shape that changes when you wear it. Laying patches on a flat table is useful, but it does not always show whether a design will feel crowded, top-heavy, or awkward once it is on your body.
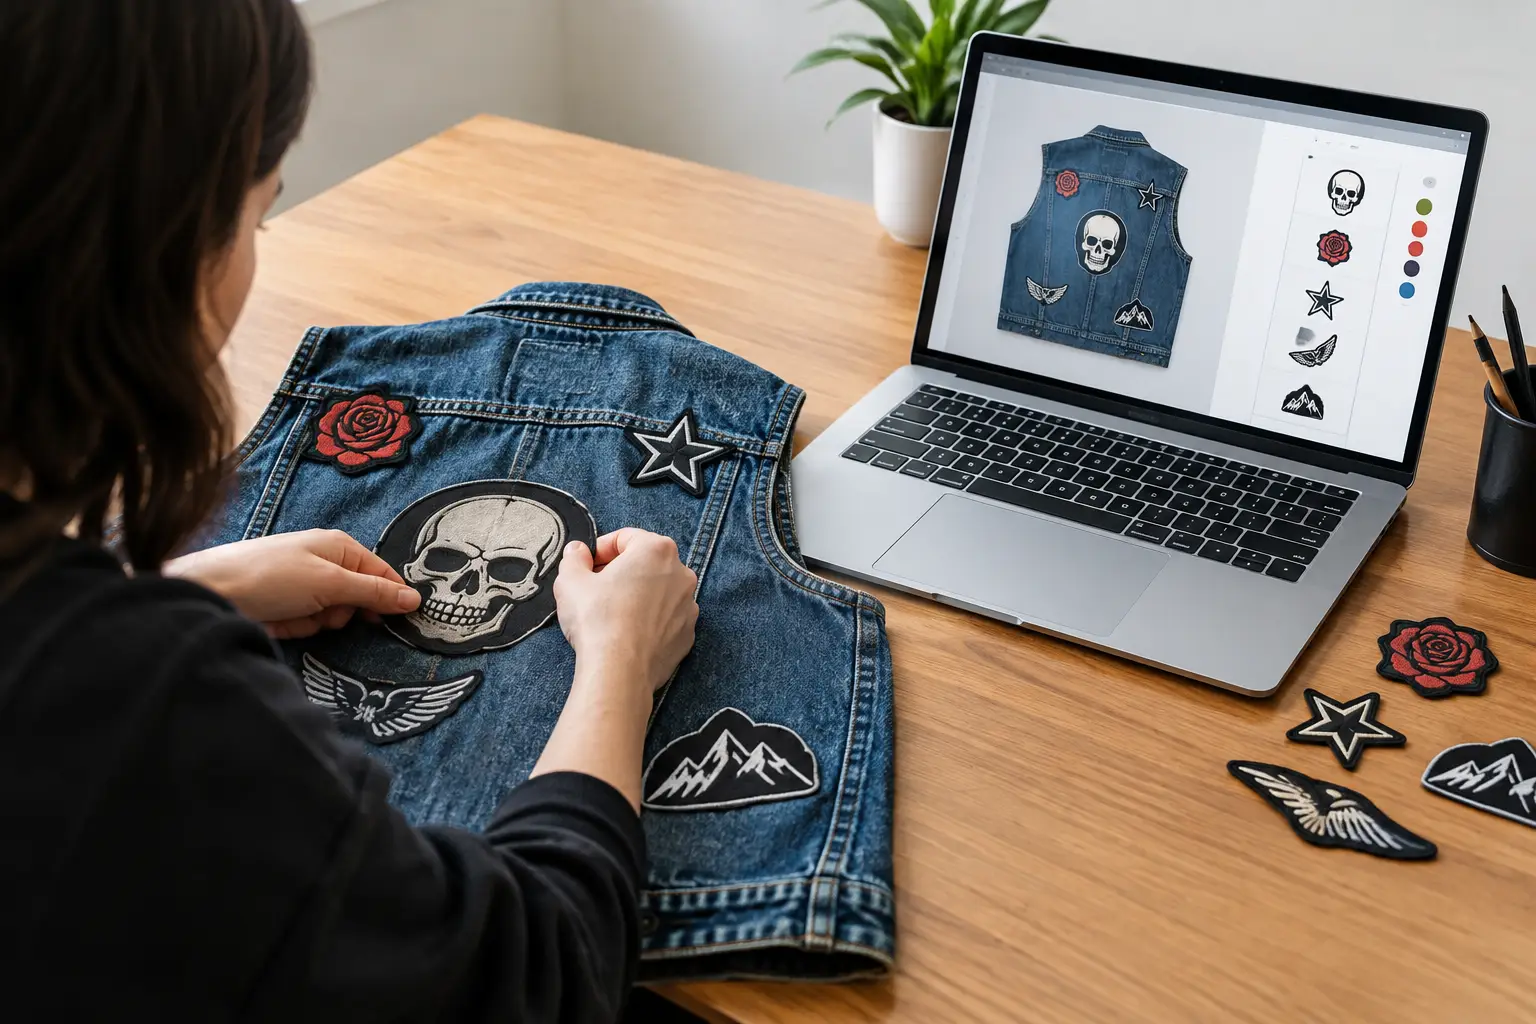
A purpose-built planner lets you choose a denim jacket or vest template, then work directly on front and back views. You can place a large backpatch first, add chest patches around pockets and seams, and see how smaller woven patches fill the remaining space. Instead of guessing whether a patch is too wide for a panel, you can scale it against a garment with real-world centimeter measurements.
The point is not to force every kutte into one approved layout. There are no strict rules. Some people want a clean, symmetrical heavy metal vest with a centered backpatch. Others want a dense punk jacket that grows in every direction over years of shows, trades, and discoveries. A builder helps with both because it shows the practical consequences of your choices without telling you what your jacket has to say.
Build Your Layout in Three Moves
Choose your jacket or vest
Start with the garment that is closest to what you actually own. A sleeveless blue denim vest has different usable areas than a black denim jacket, a leather biker jacket, or an oversized thrift-store find. Jacket color matters too. A bright printed patch can disappear against light denim, while a black-and-white design can get lost on a dark vest.
Do not choose a template just because it looks cool on screen. Think about the garment you will sew. Measure the back panel, note where the pockets sit, and check whether the collar or shoulder yoke cuts into the space you planned to use. The closer your digital starting point is to the real jacket, the better your final reference will be.
Add patches you already own or want to hunt down
Upload images of your own patches if you have them. This is especially useful for unusual shapes: long logo strips, shield patches, circular designs, oddly sized festival patches, and large backpatches with borders that take up more room than you expect.
A community patch library can also help you mock up a concept before every patch is in hand. Treat it like a planning tool, not a promise that every image will match a current physical item exactly. Manufacturers change borders, print colors, and dimensions. When you get the real patch, compare it to your saved measurements and adjust before sewing.
Place your non-negotiables first. For most builders, that means the backpatch, then major front chest patches, then large side or lower-back pieces. Those patches establish the structure. Smaller logos, tabs, and fillers can come later once you know what empty space is genuinely available.
Refine, save, and sew from a reference
Drag-and-drop is the fast part. Refining is where the layout becomes wearable. Scale patches so their visual weight makes sense, rotate angled pieces deliberately, and switch between the front and back often. A jacket should read as one piece, not two unrelated collections of fabric.
Use a grayscale preview when the colors feel busy. Grayscale strips away the red, white, neon, and metallic details that can fool your eye. If two patches blend into one dark block in grayscale, they may need more separation, a lighter border, or a different spot. That does not mean every jacket needs perfect contrast. Sometimes a wall of black patches is exactly the look. The preview simply lets you choose that effect on purpose.
Save your design before you start attaching anything. Registered users can come back to revise a layout as new patches arrive, while anyone can begin experimenting without an account, download, or ad interruption. The Black Thread is built for that low-pressure planning stage: try ideas, undo them, and keep the ones that still feel right the next day.
Start With the Back, But Do Not Ignore the Front
The back is usually the statement panel. A strong backpatch gives the eye somewhere to land, whether it is a favorite band, a scene-defining record, or a graphic that has followed you for years. Center it when you want a traditional, balanced look. Offset it if the jacket already has seams, damage, or a patchwork history you want to work around.
Give it breathing room before you pack in supporting patches. A backpatch does not need a perfectly even frame, but it can lose impact when every edge is immediately crowded. Check how far it sits from the shoulder yoke and bottom hem, then test a few arrangements around it rather than committing to the first one.
The front does different work. Chest patches are often seen first at shows and in photos, but the pockets and lapels limit the usable area. A patch that crosses a pocket may still work if you never use that pocket. If you want the garment functional, avoid blocking buttons, zipper paths, and pocket openings. This is where a front-view planner saves a lot of frustration.
Consider the jacket when it is open, too. On a buttoned vest, the two front panels create a clear left-right layout. On an open jacket, lapels fold back and patches near the opening may partly disappear. Neither approach is wrong. It depends on whether you care more about a clean standing pose or how the jacket looks in motion at a gig.
Make Patch Size and Rotation Intentional
Not every patch needs to face straight ahead. Angled logos can create movement, and tilted rectangular patches can follow the shape of a shoulder or side panel. But rotation works best when it has a reason. One accidental-looking crooked patch among an otherwise precise layout can look unfinished. Several angled pieces can look deliberate when they share a direction or create a visual rhythm.
Size is just as important. A tiny patch beside a huge, high-contrast logo may disappear completely. Before scaling everything up, remember that dense layouts need visual pauses. Small patches can work as connectors between bigger elements, while blank denim can make a favorite patch hit harder.
Real dimensions keep digital planning honest. If your back panel is narrow, a wide backpatch may curl around seams or extend into the armholes. If a chest patch is tall, it may hit the pocket flap. Measure the physical garment and use those numbers when you set your patch scale. A few centimeters can decide whether a patch lies flat or fights the jacket forever.
Leave Room for the Jacket to Grow
You do not have to fill every inch on the first pass. A battle jacket is often a record of time: the band you finally saw live, the patch picked up on tour, the trade that took months to arrange, the local act that became a favorite. Leaving a little space gives future finds somewhere to belong.
That said, planned empty space should feel different from forgotten space. Use your builder to look at the design from a distance. If the center is overloaded while the edges feel abandoned, move pieces outward. If a blank area makes the garment feel calmer and puts focus on the backpatch, keep it. Your eye will usually tell you which one it is.
Do one last screen check, then lay the real patches on the real jacket before sewing. Digital planning gets you close; fabric, stitch lines, patch thickness, and the way you wear your vest make the final call. Take a photo of that physical test layout, compare it with your saved design, and make the small changes that turn a good plan into a jacket you will keep reaching for.