Patch Spacing Guide for a Better Battle Vest
Learn how much space to leave between patches so your battle vest looks balanced, stays wearable, and still has room to grow.
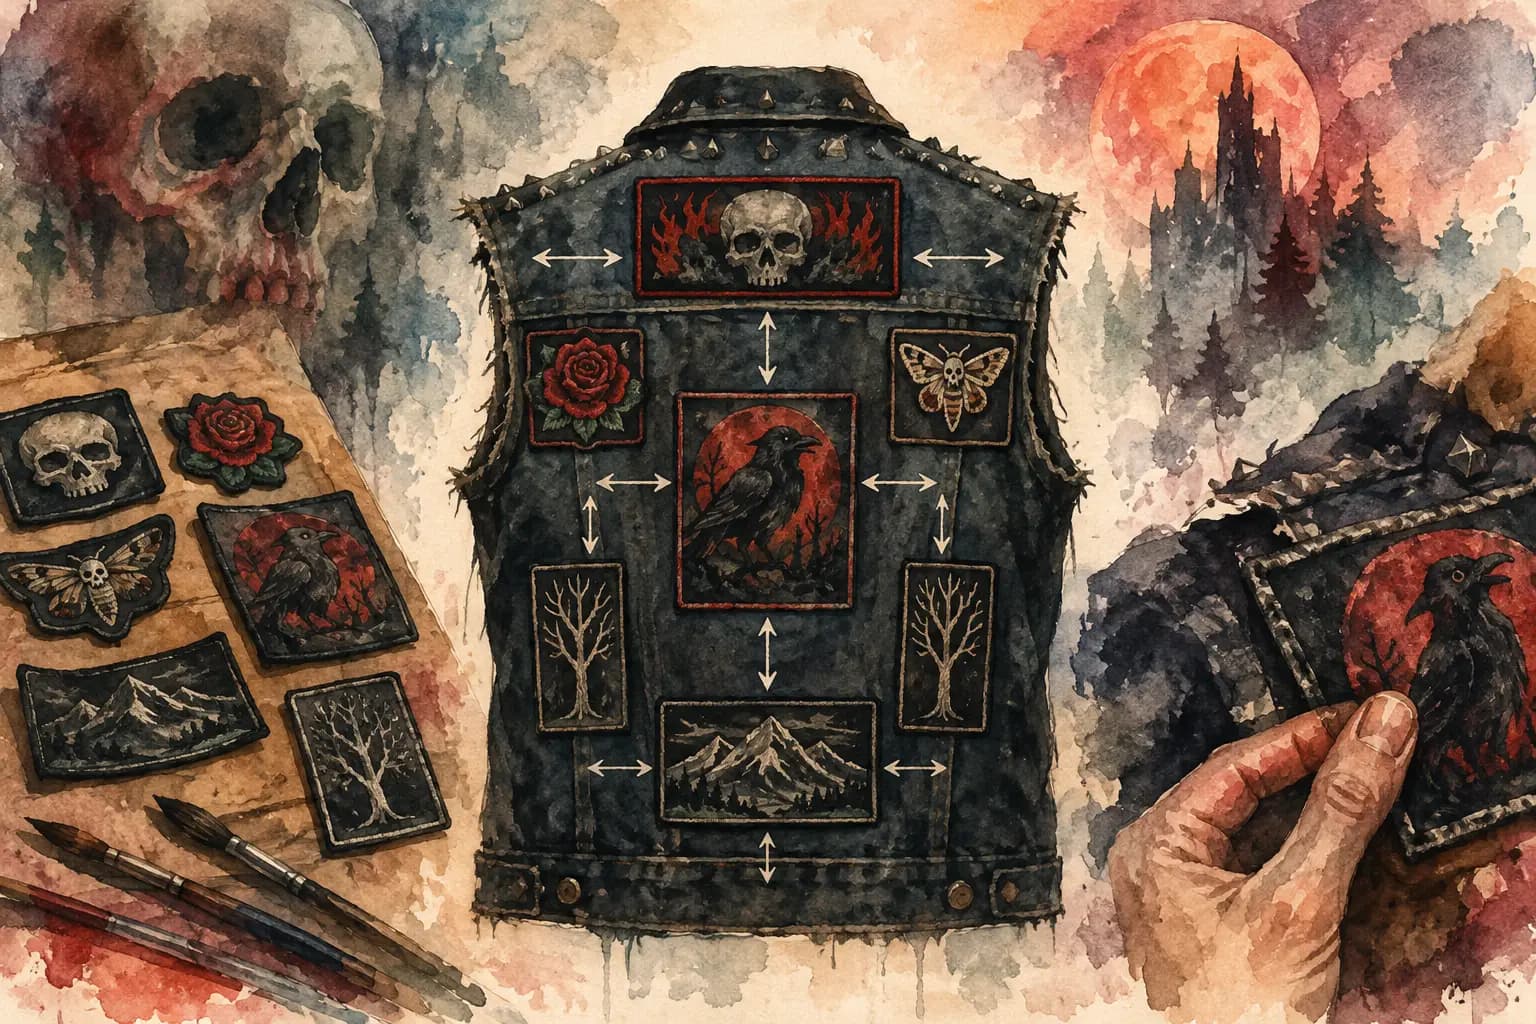
Illustrated denim battle vest with patches arranged in a symmetrical grid, double-headed arrows marking the spacing between them, surrounded by loose patches, paintbrushes, and a hand holding a raven patch.
A battle vest can look perfect on your floor, then suddenly feel cramped once it is on your body. That is where a patch spacing guide earns its place. Spacing is what keeps a jacket readable from across a venue, wearable in the pit, and personal without turning every square inch into visual static.
There are no strict rules. A dense crust-inspired wall of patches can look as right as a sparse old-school denim covered in a few hard-won pieces. But intentional spacing makes either approach feel finished. Before you sew, glue, or pin anything permanent, give your patches room to work with the shape of the garment.
Start with the garment, not the patch pile
Lay the jacket or vest flat and look at its actual usable panels. A patch that looks small in your hand may take up most of a chest panel. A large backpatch can make the lower back feel empty or leave no clearance for side seams. The garment is the frame, so its construction should decide the layout before your patch collection does.
Check the pockets, buttons, zipper, yoke seam, collar, shoulder seams, armholes, and side seams. These are not always obstacles. Sometimes they create natural boundaries that make a layout stronger. A chest patch can sit just above a pocket, for example, while a narrow woven patch can follow the angle of a yoke seam.
Fit matters too. Put the jacket on and notice where it folds. Patches placed right at the underarm, across the waist bend, or beside a stiff zipper can wrinkle, lift, or jab you when you move. Leather and heavy denim tolerate different spacing than thin, soft denim. A vest with a roomy cut gives you more freedom than a fitted jacket.
Patch spacing guide: use gaps with purpose
Most spacing decisions come down to three things: visibility, stitching room, and visual rhythm. You do not need every gap to match. You do need the gaps to look deliberate.
For medium embroidered patches, a gap of about 1/4 to 1/2 inch usually gives enough room for stitching while preventing patches from visually merging. That is roughly 0.5 to 1.25 cm. On a packed layout, you can go tighter, especially if patch borders are clean and the shapes fit together well. Leave a little more breathing room around patches with irregular silhouettes, loose merrowed edges, or busy artwork.
The back is different. A backpatch needs a border around it unless you are deliberately building a full-coverage collage. Around 1/2 to 1 inch of visible denim can make a backpatch feel framed rather than squeezed in. If you plan to add a top rocker, bottom rocker, or side patches later, reserve that space now. The most common planning mistake is centering a large backpatch first, then discovering there is no room left for the pieces that make the whole back layout feel complete.
On the front, patches do not need to mirror each other. In fact, perfect symmetry can make a battle jacket look more like a uniform than a personal archive. Balance the visual weight instead. A large bright patch on one chest can be offset by two darker pieces, a pin cluster, or a pocket patch on the other side.
Give large patches an edge buffer
Avoid placing large patches flush against a seam, collar, or armhole unless the shape was clearly made for that spot. Keep at least 1/4 inch of clearance where possible. This gives you room to stitch and helps prevent the edge from catching or curling as the garment moves.
If a patch must cross a seam, make that choice knowingly. Crossing a center seam or pocket can look killer, but it is harder to sew cleanly and may stop you from using the pocket. Test it with pins or painter's tape before committing.
Treat tiny gaps differently from empty space
A tiny accidental gap between two patches often looks worse than a larger intentional blank area. If two patches are close enough to read as one cluster, bring them together. If they are meant to stand alone, open the space enough that each has its own presence.
This is especially useful for rectangular band patches. A row of nearly touching rectangles can look sharp and organized. Scattered rectangles with random little slivers of denim between them can feel unfinished unless that rough, fragmented look is your goal.
Plan the back before filling the front
The back is usually the visual center of a kutte. Start with your backpatch, then decide whether the rest of the panel should be structured or chaotic. A classic setup may use a centered backpatch with a clean border and supporting patches around it. A patchwork-heavy vest may let the backpatch act as one anchor among many.
Keep the shoulder yoke in mind. Patches placed too high can disappear under a collar, bunch when you move, or compete with the backpatch. Likewise, leave room near the lower edge if the vest will sit over a belt or bunch when you sit down. A patch that looks centered on a flat vest can feel too low once worn.
Try viewing the layout from several distances. Up close, you should be able to see clean placement and interesting details. From several feet away, the backpatch and larger shapes should still lead the eye. A grayscale preview can help here because it strips away color and shows whether the layout has enough contrast and hierarchy.
Build clusters, not a checkerboard
Even spacing everywhere is rarely the goal. Better layouts often use clusters: a tight group of small patches near one pocket, a vertical run of woven logos along a placket, or a dense shoulder area that fades into open denim. Clusters add energy because they create contrast between packed and quiet areas.
Think about patch shape as much as patch size. Long strips work well along seams, across shoulders, and under collars. Circular patches can break up a grid of rectangles. Odd-shaped patches deserve a little more room so their outline stays visible. If every patch is the same size and orientation, rotate a few or introduce a different format to keep the layout from going flat.
That said, do not force variety for its own sake. A tight wall of similarly sized black-and-white patches can look brutal in exactly the right way. The question is whether repetition looks intentional.
Leave room for movement and future patches
A vest is not a flat patch board. It bends, twists, gets thrown over a hoodie, and gets worn through shows. Do not pack stiff embroidered pieces so tightly around high-movement zones that they fight each other. The underarms, shoulder blades, waist, and front closure all need a little respect.
Also, leave yourself an exit route. Most people collect more patches after the first layout is done. A small open panel, a reserved strip along the side, or a planned space beneath a backpatch can save you from having to rearrange half the garment later. Empty denim is not wasted space. It can be a deliberate pause or a promise of the next show, the next tour, or the next band that hits hard enough to earn a spot.
Test placement before you sew
Use safety pins, removable tape, or a digital layout before thread touches denim. Take a photo of the jacket laid flat, then another while you are wearing it. The second view catches problems that the first one hides: a patch swallowed by the armhole, a crooked chest placement, or a backpatch that sits low once the vest is on your shoulders.
Measure your garment in centimeters if you want a reliable reference. Record the width of the back panel, the distance between the collar and yoke, and the available space above pockets. This is especially helpful when buying patches online or deciding whether a new piece will fit into a planned gap.
The Black Thread lets you test scale, rotation, front-and-back placement, and contrast before the physical work begins. It is a simple way to try a packed layout, pull patches farther apart, and compare options without repeatedly pinning up your denim.
When tight spacing works and when it does not
Tight spacing works best when the patches share a visual language: similar border colors, related sizes, or a clear theme. It also works when you want a dense, lived-in vest where individual pieces form one larger texture. In that case, a few patches can nearly touch, provided their edges do not overlap or make sewing impossible.
Give more space to patches you want people to actually read. Detailed art, bright colors, rare vintage pieces, and meaningful local-band patches need a little denim around them. Otherwise, they become background noise beside louder neighbors.
Your jacket does not need to please every metalhead, punk, rocker, or hardcore kid who sees it. It needs to wear like yours. Build the layout slowly, stand back often, and leave enough room for every patch to say what it came to say.